수업시간에 활용하기 위해 만든 자료를 올립니다.

본 문서는 Android App 에서 Retrofit 을 이용하여 Back-End 와 네트워킹을 하는 방식을 설명하기 위해서 작성되었습니다.
Back-End 응용 프로그램은 Spring Boot 이며 간단한 게시판 기능을 구현해 보겠습니다.

Android 코드 개발이 주 목적이며 Back-End 는 공유된 테스트용 애플리케이션을 이용하는 것으로 하겠습니다.
Back-End 준비
테스트를 위해서는 먼저 데이터베이스와 Back-End 애플리케이션의 실행 환경이 준비되어 있어야 합니다.
JAVA_HOME , Path설정
먼저 JDK 가 설치된 디렉토리 위치가 JAVA_HOME, JDK 안의 bin 폴더를 Path 로 지정해 주어야 합니다.
H2 데이터베이스 준비
Back-End 데이터베이스는 다양화 될 수 있을 것 같습니다. 본 테스트에서 테스트용으로 가볍게 사용이 가능한 H2 데이터베이스를 이용하겠습니다.
H2 데이터베이스는 쉽게 다운로드 받아 설치가 가능합니다.
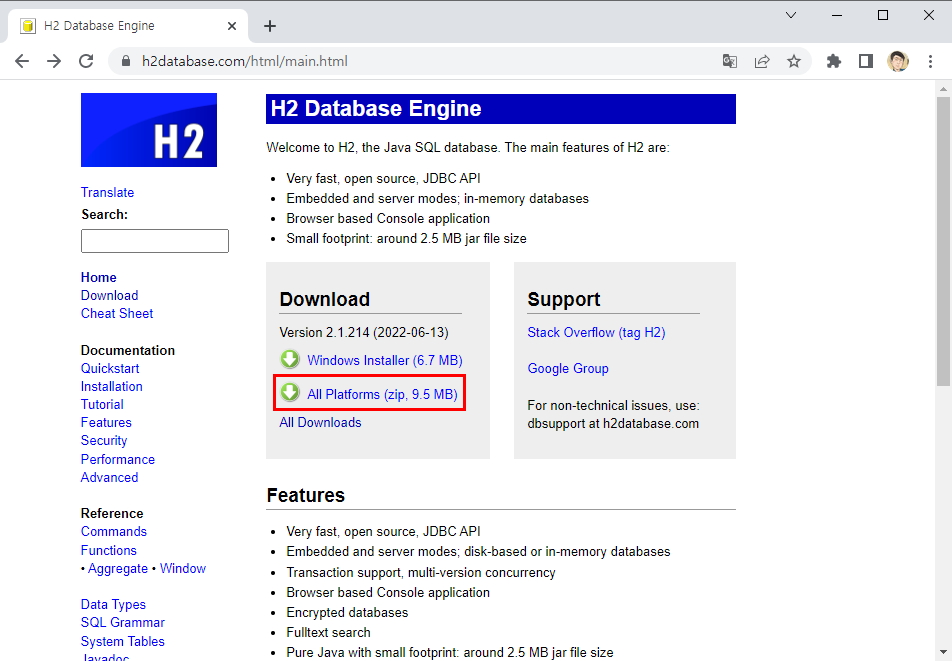
위의 화면에서 “App Platform” 을 클릭하여 H2 데이터베이스를 다운로드 받습니다.
다운로드 받은 파일을 임의의 폴더에 압축 해제합니다.
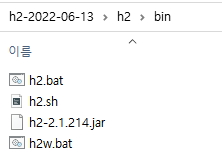
압축해제한 곳에 보면 bin 폴더가 있고 그 안에 H2 데이터베이스를 실행시킬 수 있는 파일이 있습니다.
만약 개발 PC 가 windows 라면 h2w.bat 파일을 이용하면 됩니다.
참고로 h2-2.1.214.jar 가 JDBC Driver 입니다.
h2w.bat 을 클릭해 H2 데이터베이스를 실행시키면 자동으로 브라우저가 오픈 됩니다. 만약 실행이 안된다면 JAVA_HOME, Path 설정에 문제가 있는 것입니다.

위의 화면처럼 브라우저가 출력되면 기본 설정을 그대로 유지한 상태에서 아래의 “연결” 버튼을 누릅니다.
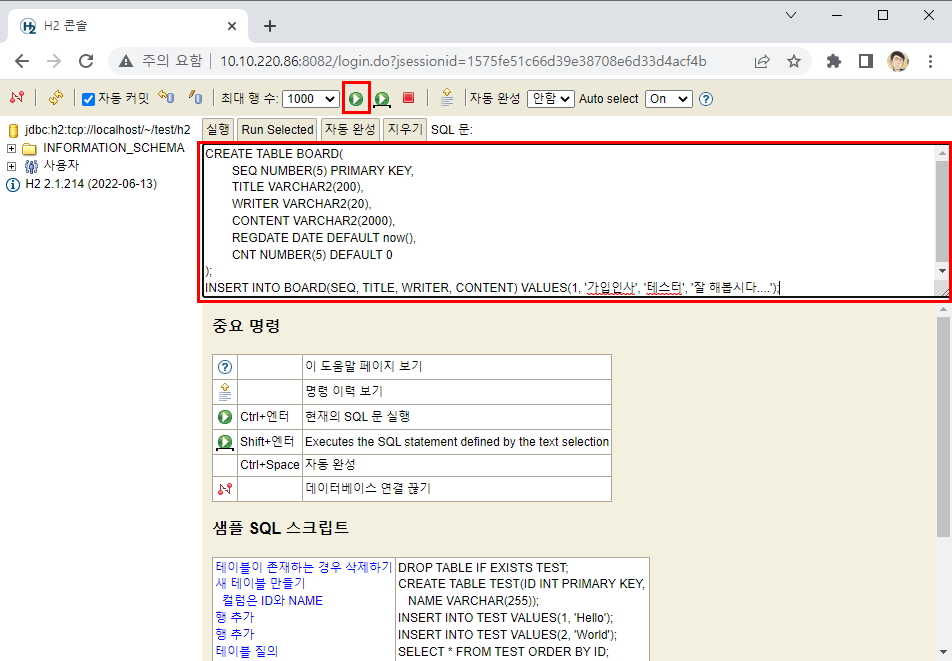
데이터베이스에 연결되면 위의 그림처럼 SQL 문을 입력하고 위의 Run 버튼을 클릭해 적용해 줍니다. 위의 그림에 작성된 SQL 문은 아래의 것을 이용했습니다.
CREATE TABLE BOARD(

           SEQ NUMBER(5) PRIMARY KEY,

           TITLE VARCHAR2(200),

           WRITER VARCHAR2(20),

           CONTENT VARCHAR2(2000),

           REGDATE DATE DEFAULT now(),

           CNT NUMBER(5) DEFAULT 0

);

INSERT INTO BOARD(SEQ, TITLE, WRITER, CONTENT) VALUES(1, '가입인사', '테스터', '잘 해봅시다....');
간단하게 BOARD 테이블을 만들고 그 안에 테스트 ROW 하나 추가한 것입니다.
이렇게 되면 H2 데이터베이스 이용준비는 끝났습니다.
Back-End 애플리케이션 실행
https://github.com/kkangseongyun/kkangs_share/blob/main/back-end.zip
GitHub - kkangseongyun/kkangs_share
Contribute to kkangseongyun/kkangs_share development by creating an account on GitHub.
github.com
이제 Android 와 연동하기 위한 Back-End 애플리케이션을 실행시킵니다.
Spring-boot 로 만든 애플리케이션이며 jar 을 실행시켜 애플리케이션을 구동 시킬 수 있습니다.
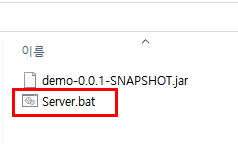
공유한 back-end.jar 파일을 압축해제하면 Server.bat 파일이 있는데 이 파일을 클릭하면 쉽게 서버를 구동할 수 있습니다.
서버가 구동된후 브라우저에서 http://localhost:8080/mobile/listBoard.do 을 입력했을 때 그림처럼 JSON 문자열이 출력되면 Back End 환경이 준비가 된 것입니다. 출력된 JSON 데이터는 Spring Boot 에서 H2 데이터베이스의 데이터를 select 해 출력한 데이터입니다.
Android App 준비
프로젝트 생성
임의의 이름으로 안드로이드 프로젝트를 만듭니다.
build.gradle 작성
모듈 수준의 build.gradle 파일을 아래처럼 작성합니다.
plugins {
    ……………………………
    id 'kotlin-parcelize'
}

…………………………………

dependencies {

    …………………………………………………

    implementation 'com.squareup.retrofit2:retrofit:2.9.0'
    implementation 'com.google.code.gson:gson:2.8.9'
    implementation 'com.squareup.retrofit2:converter-gson:2.9.0'
    implementation 'com.squareup.okhttp3:logging-interceptor:4.2.1'

}
plugins 에 ‘kotlin-parcelize’ 를 추가한 것은 Parcelable 쉽게 이용하기 위한 용도이며 Retrofit 을 이용하기 위한 라이브러리가 dependencies 에 추가된 것입니다.
Network security 설정
실전 웹 서버라면 https 프로토콜을 이용하지만 간단한 테스트용임으로 http 통신을 하게 됩니다. http 통신을 허용시키기 위한 설정이 필요합니다.
res/xml 폴더에 network_security_config.xml 파일을 만들고 아래처럼 입력해 줍니다.
<?xml version="1.0" encoding="utf-8"?>
<network-security-config xmlns:android="http://schemas.android.com/apk/res/android">
    <domain-config cleartextTrafficPermitted="true">
        <domain includeSubdomains="true">10.0.2.2</domain>
    </domain-config>
</network-security-config>
위에서 10.0.2.2 는 AVD 에서의 localhost 이며 만약 Back-End 애플리케이션이 다른 곳에 있다면 그곳의 IP 를 입력해 주면 됩니다.
AddActivity 생성
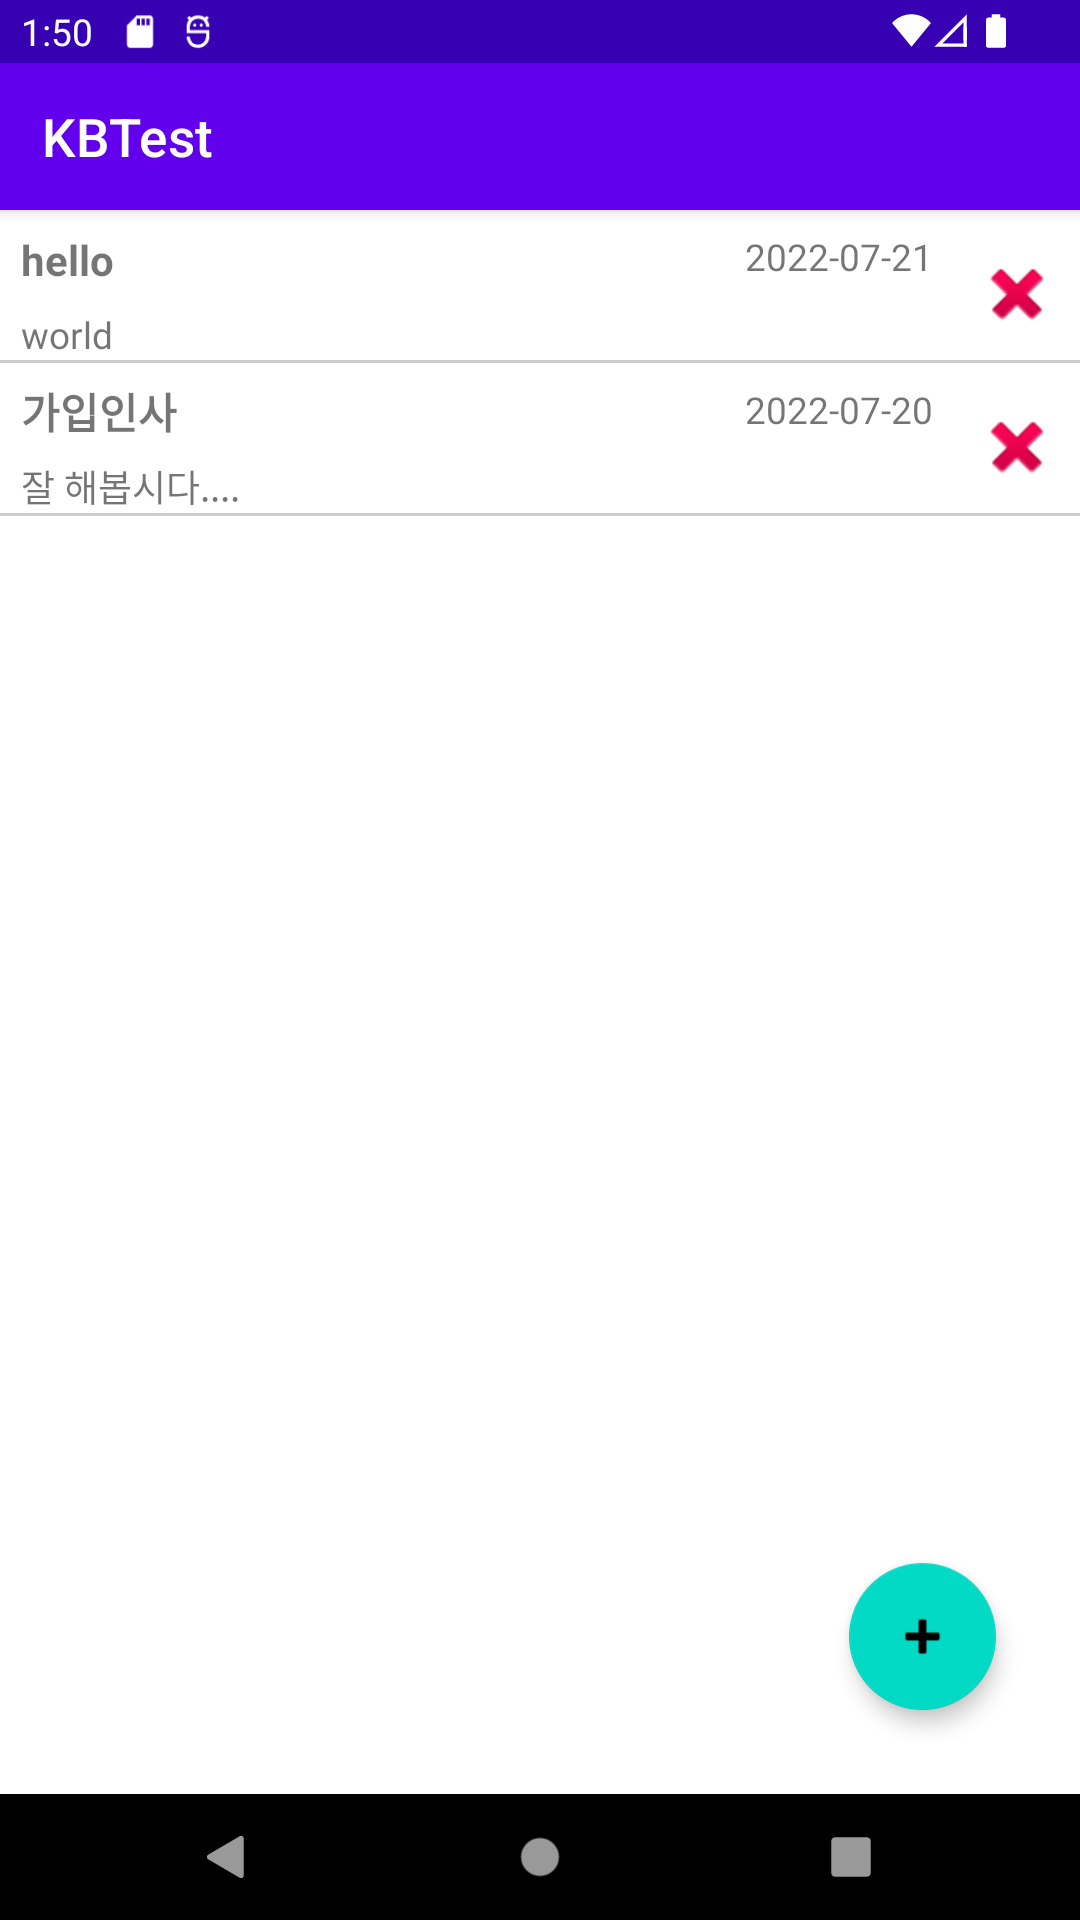
테스트 앱은 화면 두개로 구성됩니다. MainActivity 는 서버의 데이터를 받아 목록 화면을 구성하게 되며 AddActivity 는 새로운 게시글 입력 및 수정 화면을 구성하게 됩니다.
AddActivity 라는 클래스명으로 Activity 를 만들어 줍니다.
화면구성
activity_main.xml
MainActivity 화면 구성을 위해 activity_main.xml 파일을 아래처럼 작성합니다. 목록 화면 구성을 위한 RecyclerView 와 신규 입력을 위한 FloatingActionButton 을 제공하는 화면입니다.
<?xml version="1.0" encoding="utf-8"?>
<androidx.constraintlayout.widget.ConstraintLayout xmlns:android="http://schemas.android.com/apk/res/android"
    xmlns:app="http://schemas.android.com/apk/res-auto"
    xmlns:tools="http://schemas.android.com/tools"
    android:layout_width="match_parent"
    android:layout_height="match_parent"
    tools:context=".MainActivity">

    <androidx.recyclerview.widget.RecyclerView
        android:id="@+id/recyclerView"
        android:layout_width="match_parent"
        android:layout_height="match_parent"
        app:layout_constraintStart_toStartOf="parent"
        app:layout_constraintTop_toTopOf="parent" />

    <com.google.android.material.floatingactionbutton.FloatingActionButton
        android:id="@+id/floatingActionButton"
        android:layout_width="wrap_content"
        android:layout_height="wrap_content"
        android:layout_marginEnd="32dp"
        android:layout_marginBottom="32dp"
        android:clickable="true"
        app:layout_constraintBottom_toBottomOf="@+id/recyclerView"
        app:layout_constraintEnd_toEndOf="@+id/recyclerView"
        app:srcCompat="@android:drawable/ic_input_add" />
</androidx.constraintlayout.widget.ConstraintLayout>
activity_add.xml
AddActivity 화면을 구성하기 위해서 activity_add.xml 파일을 아래처럼 작성합니다. 게시글의 title 과 content 를 유저에게 입력받기 위한 화면입니다.
<?xml version="1.0" encoding="utf-8"?>
<androidx.constraintlayout.widget.ConstraintLayout xmlns:android="http://schemas.android.com/apk/res/android"
    xmlns:app="http://schemas.android.com/apk/res-auto"
    xmlns:tools="http://schemas.android.com/tools"
    android:layout_width="match_parent"
    android:layout_height="match_parent"
    tools:context=".AddActivity">

    <TextView
        android:id="@+id/textView"
        android:layout_width="wrap_content"
        android:layout_height="wrap_content"
        android:layout_marginStart="16dp"
        android:layout_marginTop="16dp"
        android:text="Title"
        app:layout_constraintStart_toStartOf="parent"
        app:layout_constraintTop_toTopOf="parent" />

    <EditText
        android:id="@+id/titleView"
        android:layout_width="0dp"
        android:layout_height="wrap_content"
        android:layout_marginStart="16dp"
        android:layout_marginTop="8dp"
        android:layout_marginEnd="16dp"
        android:ems="10"
        android:inputType="text"
        app:layout_constraintEnd_toEndOf="parent"
        app:layout_constraintStart_toStartOf="parent"
        app:layout_constraintTop_toBottomOf="@+id/textView" />

    <TextView
        android:id="@+id/textView2"
        android:layout_width="wrap_content"
        android:layout_height="wrap_content"
        android:layout_marginStart="16dp"
        android:layout_marginTop="16dp"
        android:text="Content"
        app:layout_constraintStart_toStartOf="parent"
        app:layout_constraintTop_toBottomOf="@+id/titleView" />

    <EditText
        android:id="@+id/contentView"
        android:layout_width="0dp"
        android:layout_height="wrap_content"
        android:layout_marginStart="16dp"
        android:layout_marginTop="8dp"
        android:layout_marginEnd="16dp"
        android:ems="10"
        android:inputType="text|textMultiLine"
        android:lines="10"
        app:layout_constraintEnd_toEndOf="parent"
        app:layout_constraintStart_toStartOf="parent"
        app:layout_constraintTop_toBottomOf="@+id/textView2" />
</androidx.constraintlayout.widget.ConstraintLayout>
item_main.xml
RecyclerView 의 항목을 구성하기 위해서 item_main.xml 파일을 만들고 아래처럼 작성합니다.
<?xml version="1.0" encoding="utf-8"?>
<androidx.constraintlayout.widget.ConstraintLayout xmlns:android="http://schemas.android.com/apk/res/android"
    xmlns:app="http://schemas.android.com/apk/res-auto"
    xmlns:tools="http://schemas.android.com/tools"
    android:layout_width="match_parent"
    android:layout_height="wrap_content">

    <TextView
        android:id="@+id/titleView"
        android:layout_width="wrap_content"
        android:layout_height="wrap_content"
        android:layout_marginStart="8dp"
        android:layout_marginTop="8dp"
        android:text="title"
        android:textSize="16dp"
        android:textStyle="bold"
        app:layout_constraintStart_toStartOf="parent"
        app:layout_constraintTop_toTopOf="parent" />

    <TextView
        android:id="@+id/contentView"
        android:layout_width="wrap_content"
        android:layout_height="wrap_content"
        android:layout_marginStart="8dp"
        android:layout_marginTop="8dp"
        android:text="TextView"
        app:layout_constraintStart_toStartOf="parent"
        app:layout_constraintTop_toBottomOf="@+id/titleView" />

    <ImageView
        android:id="@+id/deleteImageView"
        android:layout_width="wrap_content"
        android:layout_height="wrap_content"
        android:layout_marginTop="16dp"
        android:layout_marginEnd="8dp"
        app:layout_constraintEnd_toEndOf="parent"
        app:layout_constraintTop_toTopOf="parent"
        app:srcCompat="@android:drawable/ic_delete"
        android:clickable="true"/>

    <TextView
        android:id="@+id/dateView"
        android:layout_width="wrap_content"
        android:layout_height="wrap_content"
        android:layout_marginTop="8dp"
        android:layout_marginEnd="16dp"
        android:text="date"
        app:layout_constraintEnd_toStartOf="@+id/deleteImageView"
        app:layout_constraintTop_toTopOf="parent" />
</androidx.constraintlayout.widget.ConstraintLayout>
divider.xml
RecyclerView 의 divider 로 사용하기 위한 이미지를 drawable 에 divider.xml 파일로 구성합니다.
<?xml version="1.0" encoding="utf-8"?>
<shape xmlns:android="http://schemas.android.com/apk/res/android"
    android:shape="rectangle">
    <size
        android:width="1dp"
        android:height="1dp" />
    <solid android:color="#cccccc" />
</shape>
메뉴구성
AddActivity 에서 입력된 글 저장을 위한 메뉴를 제공하기 위해 menu 폴더에 menu_add.xml 파일을 아래처럼 작성합니다.
<?xml version="1.0" encoding="utf-8"?>
<menu xmlns:android="http://schemas.android.com/apk/res/android"
    xmlns:app="http://schemas.android.com/apk/res-auto">
    <item
        android:id="@+id/menu_save"
        android:title="save"
        app:showAsAction="always"/>
</menu>
코드 작성

BoardService 는 Retrofit 의 ApiService 이며 Board 가 서버 네트워킹 데이터를 추상화 시킨 DTO 클래스입니다. MyAdapter 는 RecyclerView 를 구성하기 위한 ViewHolder 와 Adapter 를 위한 파일이며 MyApplication 을 Retrofit 초기화가 구현될 Application 클래스입니다.
테스트를 위한 코드는 아래처럼 구성합니다.
Board.kt
@Parcelize
data class Board(val seq: Int, var title: String, var writer: String, var content: String, var regDate: Date, var cnt: Int): Parcelable
서버 송수신 데이터를 추상화 시킨 DTO 클래스인데 Intent 의 Extra 데이터로 이용하기 위해서 Parcelable 을 구현했으며 Parcelable 을 쉽게 만들기 위해서 @Parcelize 어노테이션을 추가했습니다.
BoardService.kt
interface BoardService {

    @POST("addBoard.do")
    fun addBoard(@Body board: Board): Call<String>

    @GET("listBoard.do")
    fun listBoard(): Call<MutableList<Board>>

    @POST("updateBoard.do")
    fun updateBoard(@Body board: Board): Call<String>

    @POST("deleteBoard.do")
    fun deleteBoard(@Body board: Board): Call<String>

    @POST("getBoard.do")
    fun getBoard(@Body board: Board): Call<Board>

}
서버와 네트워킹시 호출할 API 가 선언된 인터페이스입니다.
addBoard(), updateBoard(), deleteBoard() 의 리턴 타입이 String 인데 이는 서버에서 정상적으로 실행된후 “success” 라는 문자열을 리턴하게 구성하였기 때문입니다.
MyAdapter.kt
class MyViewHolder(val binding: ItemMainBinding) : RecyclerView.ViewHolder(binding.root)

class MyAdapter(val context: Context, val datas: MutableList<Board>) : RecyclerView.Adapter<MyViewHolder>() {

    val updateLiveData = MutableLiveData<Board>()
    val deleteLiveData = MutableLiveData<Board>()

    override fun getItemCount(): Int {
        return datas.size
    }
    override fun onCreateViewHolder(parent: ViewGroup, viewType: Int): MyViewHolder {
        return MyViewHolder(ItemMainBinding.inflate(
            LayoutInflater.from(
            parent.context), parent, false))
    }

    override fun onBindViewHolder(holder: MyViewHolder, position: Int) {
        holder.binding.titleView.text = datas[position].title
        holder.binding.contentView.text = datas[position].content
        holder.binding.dateView.text = SimpleDateFormat("yyyy-MM-dd").format(datas[position].regDate)

        holder.binding.root.setOnClickListener {
            updateLiveData.postValue(datas[position])
        }

        holder.binding.deleteImageView.setOnClickListener {
            AlertDialog.Builder(context).run {
                setIcon(android.R.drawable.ic_dialog_alert)
                setTitle("Warning")
                setMessage("정말 삭제 하시겠습니까?")
                setPositiveButton("OK", { dialog, whitch ->
                    deleteLiveData.postValue(datas[position])
                })
                setNegativeButton("CANCEL", null)
                show()
            }
        }
    }
}
RecyclerView 의 항목을 구성하기 위한 Adapter 입니다. 항목에서 발생하는 게시글 수정 및 삭제 이벤트 처리를 MainActivity 에서 하기 위해서 updateLiveData 와 deleteLiveData 를 만들었으며 Adapter 에서는 이벤트 발생시 LiveData 를 이용해 데이터만 발생시키고 실제적인 이벤트 처리는 LiveData 의 데이터 발생을 감지하는 MainActivity 에서 처리합니다.
MyApplication.kt
class MyApplication: Application() {
    var boardService: BoardService

    val retrofit: Retrofit
        get() {
            val interceptor = HttpLoggingInterceptor()
            interceptor.level = HttpLoggingInterceptor.Level.BODY
            val client = OkHttpClient().newBuilder().addInterceptor(interceptor).build()

            val gson = GsonBuilder()
                .setLenient()//문자열 리턴의 경우를 위해서
                .setDateFormat("yyyy-MM-dd'T'HH:mm:ss.SSS")//서버와 date 포멧을 맞추기 위해서
                .create()

            return Retrofit.Builder()
                .baseUrl("http://10.0.2.2:8080/mobile/")
                .client(client)
                .addConverterFactory(GsonConverterFactory.create(gson))
                .build()

        }

    init {
        boardService = retrofit.create(BoardService::class.java)
    }
}
Retrofit 을 이용하기 위한 Retrofit 객체 생성 및 ApiService 등록을 위해 코드입니다.
MainActivity.kt
class MainActivity : AppCompatActivity() {

    lateinit var addLuncher: ActivityResultLauncher<Intent>
    var boardList = mutableListOf<Board>()
    var adapter = MyAdapter(this, boardList)
    var mode = "add"

    override fun onCreate(savedInstanceState: Bundle?) {
        super.onCreate(savedInstanceState)
        val binding = ActivityMainBinding.inflate(layoutInflater)
        setContentView(binding.root)

        binding.recyclerView.layoutManager = LinearLayoutManager(this@MainActivity)
        binding.recyclerView.adapter = adapter
        val dividerItemDecoration = DividerItemDecoration(
            this,
            LinearLayoutManager(this).orientation
        )
        dividerItemDecoration.setDrawable(resources.getDrawable(R.drawable.divider))
        binding.recyclerView.addItemDecoration(dividerItemDecoration)

        val boardService = (applicationContext as MyApplication).boardService

        val call = boardService.listBoard()
        call.enqueue(object : Callback<MutableList<Board>> {
            override fun onResponse(call: Call<MutableList<Board>>, response: Response<MutableList<Board>>) {
                boardList.addAll(response.body() ?: mutableListOf())

                adapter.notifyDataSetChanged()
            }

            override fun onFailure(call: Call<MutableList<Board>>, t: Throwable) {
                Log.d("kkang", "${t.printStackTrace()}")
                call.cancel()
            }
        })

        addLuncher = registerForActivityResult(
            ActivityResultContracts.StartActivityForResult()
        ){
            if(mode == "add"){
                it.data?.getParcelableExtra<Board>("result")?.let {
                    boardList.add(0, it)
                    adapter.notifyDataSetChanged()
                }
            }else {
                //update
                it.data?.getParcelableExtra<Board>("result")?.apply {
                    boardList.forEachIndexed { index, board ->
                        if(seq == board.seq){
                            boardList.set(index, this)
                        }
                    }
                    adapter.notifyDataSetChanged()
                }
            }
        }

        binding.floatingActionButton.setOnClickListener {
            mode = "add"
            val intent = Intent(this, AddActivity::class.java)
            addLuncher.launch(intent)
        }

        adapter.updateLiveData.observe(this) {
            mode = "update"
            val intent = Intent(this, AddActivity::class.java)
            intent.putExtra("dto", it)
            addLuncher.launch(intent)
        }
        adapter.deleteLiveData.observe(this){
            val call = boardService.deleteBoard(it)
            call.enqueue(object : Callback<String> {
                override fun onResponse(call: Call<String>, response: Response<String>) {
                    val result  = response.body()!!
                    if(result == "success"){
                        boardList.remove(it)
                        adapter.notifyDataSetChanged()
                    }
                }

                override fun onFailure(call: Call<String>, t: Throwable) {
                    call.cancel()
                }
            })


        }
    }
}
MainActivity 에서 Retrofit 을 이용해 서버와 통신을 하게 됩니다.
onCreate 함수에서 listBoard() 함수를 호출하며 서버에서 목록을 구성하기 위한 데이터를 획득하며 deleteLiveData 에 데이터가 발행되는 순간 deleteBoard() 함수를 호출하여 서버에 데이터 삭제를 요청합니다.
AddActivity.kt
class AddActivity : AppCompatActivity() {

    lateinit var binding: ActivityAddBinding
    lateinit var board: Board
    var mode = "add"

    override fun onCreate(savedInstanceState: Bundle?) {
        super.onCreate(savedInstanceState)
        binding = ActivityAddBinding.inflate(layoutInflater)
        setContentView(binding.root)

        intent.getParcelableExtra<Board>("dto")?.let {
            board = it
            mode = "update"
            binding.titleView.setText(it.title)
            binding.contentView.setText(it.content)
        }
    }

    override fun onCreateOptionsMenu(menu: Menu?): Boolean {
        menuInflater.inflate(R.menu.menu_add, menu)
        return super.onCreateOptionsMenu(menu)
    }

    override fun onOptionsItemSelected(item: MenuItem): Boolean {
        if(item.itemId == R.id.menu_save){
            if(binding.titleView.text.isNotEmpty() && binding.contentView.text.isNotEmpty()){
                val boardService = (applicationContext as MyApplication).boardService

                if(mode == "add"){
                    board = Board(0, binding.titleView.text.toString(), "kkang", binding.contentView.text.toString(), Date(), 0)
                    val call = boardService.addBoard(board)
                    call.enqueue(object : Callback<String> {
                        override fun onResponse(call: Call<String>, response: Response<String>) {
                            val result = response.body()!!
                            Log.d("kkang", "add result:$result")
                            if(result == "success"){
                                intent.putExtra("result", board)
                                setResult(RESULT_OK, intent)
                                finish()
                            }
                        }

                        override fun onFailure(call: Call<String>, t: Throwable) {
                            t.printStackTrace()
                            call.cancel()
                        }
                    })
                }else {
                    //update...
                    board.title = binding.titleView.text.toString()
                    board.content = binding.contentView.text.toString()
                    val call = boardService.updateBoard(board)
                    call.enqueue(object : Callback<String> {
                        override fun onResponse(call: Call<String>, response: Response<String>) {
                            val result = response.body()!!
                            if(result == "success"){
                                Log.d("kkang","222222222222")
                                intent.putExtra("result", board)
                                setResult(RESULT_OK, intent)
                                finish()
                            }
                        }

                        override fun onFailure(call: Call<String>, t: Throwable) {
                            call.cancel()
                        }
                    })
                }

            }else {
                Toast.makeText(this, "required data", Toast.LENGTH_SHORT).show()
            }

        }
        return super.onOptionsItemSelected(item)
    }
}
유저 글입력을 위한 액티비티이며 유저가 글을 입력한후 메뉴를 클릭했을 때 서버와 네트워킹을 하게 구현되었습니다. AddActivity 를 실행시킨 mode 값이 add 이면 addBoard() 함수를 호출하며 서버에 데이터 저장을 의뢰하며 update 이면 updateBoard() 함수를 호출하여 서버에 데이터 수정을 의뢰하게 구현되었습니다.
AndroidManifest.xml 설정
마지막으로 AndroidManifest.xml 파일을 아래처럼 설정해 줍니다.
<uses-permission android:name="android.permission.INTERNET" />

<application
    android:name=".MyApplication"
    …………………………………
    android:networkSecurityConfig="@xml/network_security_config">
네트워킹을 위해 퍼미션이 선언되어 있으며 application 태그에 우리가 작성한 MyApplication 이 name 속성으로 등록되어 있습니다. 또한 http 통신을 허용하기 위한 xml 파일을 networkSecurityConfig 속성으로 등록하였습니다.
테스트

'Android' 카테고리의 다른 글
| Android JWT 인증 with Retrofit, Spring boot (0) | 2022.07.27 |
|---|---|
| Multiple File upload, download with retrofit, Glide, spring boot (0) | 2022.07.25 |
| [깡쌤의 안드로이드 프로그래밍 with 자바 - 2022 - 쌤즈] 정리 25 - GoogleMap (0) | 2022.05.09 |
| [깡쌤의 안드로이드 프로그래밍 with 자바 - 2022 - 쌤즈] 정리 24 - Retrofit2 구조 (0) | 2022.05.09 |
| [깡쌤의 안드로이드 프로그래밍 with 자바 - 2022 - 쌤즈] 정리 23 - 파일 읽고 쓰기 (0) | 2022.05.09 |